REVIEW · MEXICO CITY
Iztaccihuatl Guided Climb
Book on GetYourGuide →Operated by Travesías México · Bookable on GetYourGuide
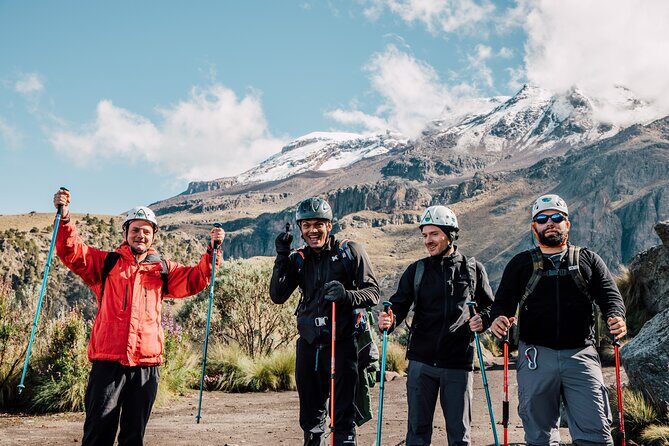
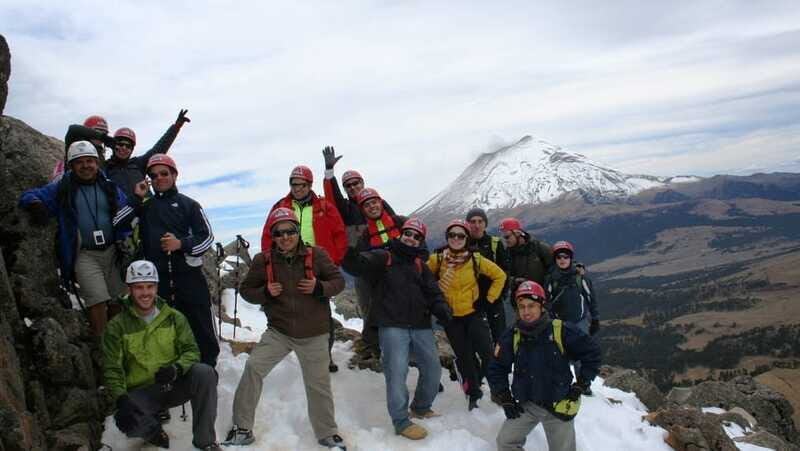
Steep air changes everything fast. This guided climb on Iztaccíhuatl gives you big-mountain views and real time in volcanic terrain, without needing to plan the route yourself. The big appeal for me is that you’re not just walking uphill—you’re moving between passes with a guide and getting a viewpoint-by-viewpoint read on what you’re seeing.
Two things I’d bet you’ll love: first, the panoramic views—Popocatépetl, Puebla below, and even Pico de Orizaba on a clear day. Second, the human touch: a professional guide keeps the pace sane and the route feeling secure, especially as altitude starts to matter.
One consideration: this is a steep, exposed climb at real elevation. Expect some people to feel lightheaded; if you have heart or respiratory issues, or you’re not comfortable with steep terrain, this one may not be for you.
In This Review
- Key Highlights You’ll Actually Feel
- From Mercado Michoacán Up to Iztaccíhuatl: how the day starts
- The Drive-Then-View Strategy: what makes the climb work
- Walking the Passes: how the route reveals the volcano
- The High Destination: reaching the 100 Hut around 4,720 meters
- Lunch on the Mountain: simple fuel where it matters
- Restroom Reality Check in the National Park
- Guides, Equipment, and Why This Tour Feels Safer
- What to Bring: your packing list for altitude and weather
- Who Should Join and Who Should Skip
- Transportation and Timing: van rides that set expectations
- Price and Value: is $214 a fair deal for a guided high climb?
- Final Call: should you book this Iztaccíhuatl guided climb?
- FAQ
- Where is the meeting point?
- How long is the climb experience?
- What’s included in the price?
- Is alcohol included?
- What language is the guide?
- What should I bring?
- Is this tour for everyone?
- How many people are in the group?
Key Highlights You’ll Actually Feel

- Small-group attention (up to 15) means less waiting and more time to ask questions
- Professional guides help you navigate steep sections with safer pacing
- Volcano-to-volcano views include Popocatépetl and distant Pico de Orizaba
- Altitude reaches around 4,720 meters at the 100 Hut destination area
- Technical equipment plus a loaned backpack keeps you from scrambling for gear
- Limited restroom access in the park means you must plan ahead and carry what you need
From Mercado Michoacán Up to Iztaccíhuatl: how the day starts
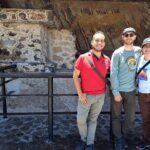
The day begins at Mercado Michoacán, right where Vicente Suárez meets Michoacán, by the benches in front of the market. It’s a practical meeting point, and it gets you ready for the long morning drive before you start hiking.
You’ll hop into a van for about two hours toward the national park area. This matters because Iztaccíhuatl doesn’t feel like a casual stroll the second you step out. You’ll want your legs warm, your water settled, and your head clear before the steep part.
In the group, you can expect English or Spanish from a live guide, and a maximum group size of 15 people. That small size is a quiet advantage: you can keep your pace without getting lost in a crowd, and the guide can watch footing and breathing more closely.
You can also read our reviews of more guided tours in Mexico City
The Drive-Then-View Strategy: what makes the climb work

This isn’t a hike where you’re only looking down at your boots. The route is built around movement plus viewpoint timing, so you get turns where the landscape finally makes sense.
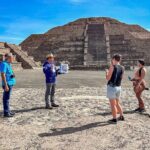
Early on, you’ll reach the first high-area stop for a photo moment and guided tour, then continue with scenic walking segments. This is when I’d use the guide’s explanations to understand what you’re looking at before you get tired. Seeing Popocatépetl from one side of the mountain while you’re still fresh makes the whole route feel connected.
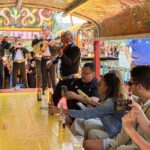
You also get a lunch break inside the Iztaccíhuatl–Popocatépetl National Park, with regional food included. That break is more than comfort—it’s part of staying steady on altitude. Eating something real helps you keep energy up for the steeper sections later.
Walking the Passes: how the route reveals the volcano
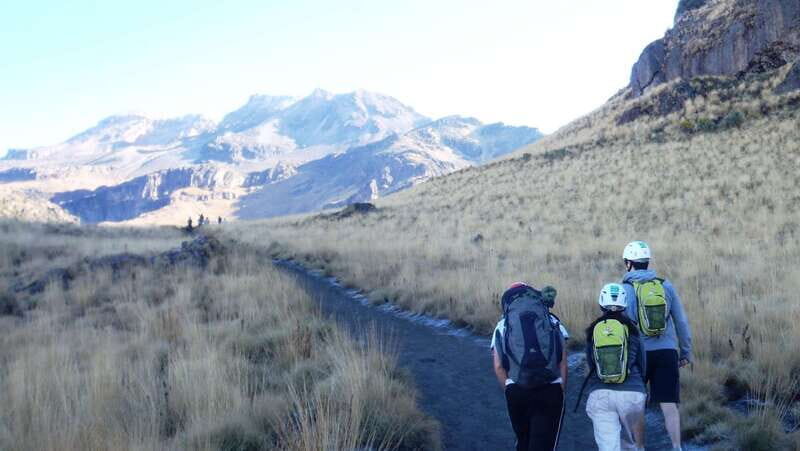
The climb is organized around reaching key points—passes where you cross from one side of the mountain’s terrain to the other. Each time you crest and switch sides, the view changes in a way that makes the work feel worth it.
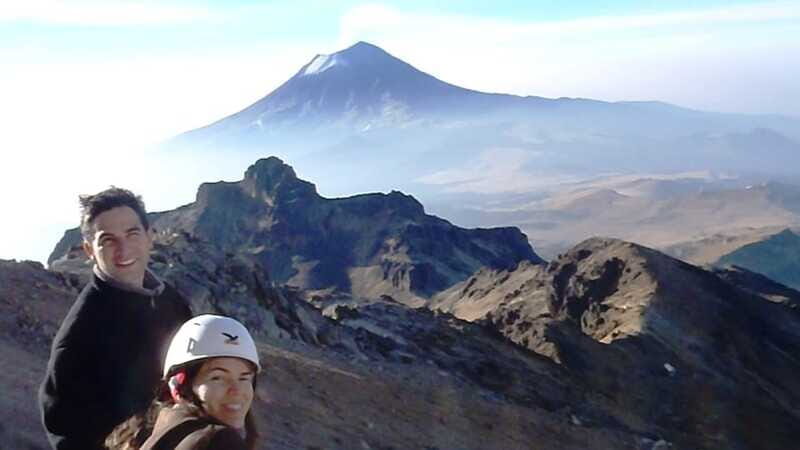
At the first pass, you’ll get a look toward the other side of the mountain, with Popocatépetl as a major visual anchor. This is a classic volcanic relationship: you’re walking on one giant, and another one dominates the view at the same time. It’s the kind of thing you can’t replicate in photos after the fact.
After that, you’ll continue to a scree slope and move toward the next major pass. Scree can feel mentally draining because your footing changes constantly. A good guide matters here, because you want clear instructions on where to step and how to place weight without losing balance.
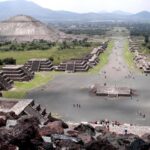
When you reach the third pass, you cross again to the other side. This is where the route swings toward wider context: you can see the city of Puebla and, if conditions cooperate, Pico de Orizaba in the distance. That combination—city below, highest peak in Mexico in view—makes the day feel bigger than just climbing a peak.
The High Destination: reaching the 100 Hut around 4,720 meters
The endpoint is the 100 Hut, at about 4,720 meters above sea level. You’re not just “visiting” this spot; you’re reaching it after steep climbing, which makes it feel earned in a very physical way.
At this elevation, altitude isn’t a theory. It’s a sensation—breathing works harder, and your pace naturally slows. This is exactly where a patient guide can save your day. One of the guides named Alberto (and others in the same crew) is described as both experienced and supportive when people adjust to altitude by hiking slower.
If you’re sensitive to altitude, treat the climb like a controlled effort, not a race. Tell the guide early if you’re feeling off, and stick with the group’s steady rhythm. People can push too hard at the beginning, and the consequences show up later—especially on the descent.
Lunch on the Mountain: simple fuel where it matters
Lunch happens inside the park area, with regional food included. The practical point here is timing. Eating before the final push helps you avoid the classic combo: low energy plus high altitude plus steep terrain.
You’ll also have a chance to regroup—water, wipe sweat, and adjust layers. Weather around volcanoes can change fast, so treat lunch as a mini reset. If it looks like rain is forming, act before the temperature drops.
Also note a small but important reality: once you’re in the park area, comfort facilities aren’t like a city park. Plan for this before you need it, and don’t assume you can solve it last-minute.


Restroom Reality Check in the National Park
There’s a key heads-up that I think every planner should take seriously: after you arrive in the national park area, there are no restroom facilities—even at the trailhead. If you need a bathroom stop, use it earlier, such as a stop you can access before you fully enter the hike zone.
This isn’t about being dramatic. It’s about preventing stress. Bring toilet paper and a small plan for waste, like a bag you can pack out if needed.
It’s a detail that can make the difference between feeling relaxed and spending the climb mentally calculating logistics. Do the prep, and you’ll enjoy the mountain more.
Guides, Equipment, and Why This Tour Feels Safer
You get a professional guide, plus technical equipment and insurance included. You’re also getting a loan of a backpack, which is a practical bonus if you’re arriving already loaded with other sightseeing bags.
The guide’s job isn’t just giving direction. It’s managing pacing, spacing, and safety in steep or exposed sections. In one set of experiences, guides like Sergio are described as courteous and patient, making rocky movement feel controlled and fun. When the route gets hard, that patience becomes real value.
For you, the best sign is how the guide handles altitude adaptation. If someone needs to slow down, you should expect the group to adjust rather than push through. With small groups and professional leadership, the tour tends to stay organized even when bodies respond differently to the climb.
What to Bring: your packing list for altitude and weather
This climb can demand both warmth and sun protection, even if the forecast looks calm. Bring comfortable shoes (and ideally hiking shoes), sunglasses, and sunscreen. At altitude, sun glare can be intense.
For clothing, bring comfortable clothes, plus change of clothes. Add rain gear because mountain weather likes surprises, and bring gloves because exposed hands feel the chill quickly at elevation.
Also pack smart for practical life on the route: a towel (handy for sweat and quick resets), comfortable layers, and water capacity that matches your comfort. If you use trekking poles, you might find them helpful, but the tour’s included equipment is what really keeps the essentials covered.
And because this is a day on a steep mountain: sturdy foot support beats fashion every time.
Who Should Join and Who Should Skip
This is listed as not suitable for pregnant women, people with back problems, heart problems, or respiratory issues. That’s consistent with what the route implies: steep segments, altitude strain, and an environment where you don’t want sudden health surprises far from help.
If you’re generally healthy but new to altitude, you can still consider it—just understand you may need to go slower than you think. One person noted feeling lightheaded and adjusting pace, and the guide supported that slower rhythm. That’s good news for first-timers who plan to take it easy.
If you know you handle steep terrain poorly, don’t “tough it out.” Choose a different hike. The mountain doesn’t care about pride.
Transportation and Timing: van rides that set expectations
You’re looking at two hours by van at the start and two hours back. That structure shapes the day: the climb itself is long, but the overall schedule is built around getting you to the right trail zone and then returning safely.
The duration is listed as 1 day, and the climbing and walking block is substantial. Plan your energy for a full-day commitment, not just a short summit moment.
Also, check availability for starting times, since the exact departure can vary. The main goal is the same: start early enough that you’re not rushing later on the mountain.
Price and Value: is $214 a fair deal for a guided high climb?
At $214 per person, you’re paying for more than a guide. You’re buying organization and risk management in an altitude setting.
Here’s what’s included:
- Transportation by van
- Guide
- Mountain fees
- Technical equipment
- Lunch (regional food) plus food
- Insurance
- Loan of a backpack
And what’s not included:
- Alcoholic drinks
So the value question comes down to this: can you realistically self-organize a guided, fee-covered, insured, equipment-ready climb with a small group and a planned lunch? For most people, the answer is no. You’d spend time figuring logistics, pay for gear rentals, and still be stuck with the altitude pacing question.
The price feels fair because it covers the stuff that makes the climb work, not just the view.
Final Call: should you book this Iztaccíhuatl guided climb?
Book it if you want a real high-mountain day with a guide, and you’re excited about volcanic views that include Popocatépetl and a shot at Pico de Orizaba. The small group size and professional support make this one of those climbs where you feel held, even while you’re doing the hard work yourself.
Skip it if steep exposure and altitude are outside your comfort zone, or if you fall into the listed health categories. Also, if you’re the type who hates planning for basics like restroom access, read the restroom reality carefully and pack accordingly.
One last tip that will help you enjoy the day: treat pace as part of safety. Slow and steady wins at altitude, and a patient guide makes that strategy feel normal.
FAQ
Where is the meeting point?
You’ll meet at the corner of Vicente Suarez and Michoacan at the benches in front of the market.
How long is the climb experience?
The activity is listed as 1 day.
What’s included in the price?
Included are transportation, a guide, mountain fees, technical equipment, lunch and food, insurance, and a loan of a backpack.
Is alcohol included?
No. Alcoholic drinks are not included.
What language is the guide?
The live tour guide is available in English and Spanish.
What should I bring?
Bring comfortable shoes or hiking shoes, sunglasses, sunscreen, rain gear, gloves, a towel, change of clothes, and comfortable clothes.
Is this tour for everyone?
It’s not suitable for pregnant women, and people with back problems, heart problems, or respiratory issues.
How many people are in the group?
The group is limited to 15 participants.